How to Create a List
Lists are created per group by group Owners and group Members.
To create a new list:
1. In the «My Desktop» area select the «List» tab and click «New List».
2. Choose what type of information you want to include in your list, for example, personal tasks, bugs, claims, etc. You can select several types of information by pressing and holding the CTRL or SHIFT key.
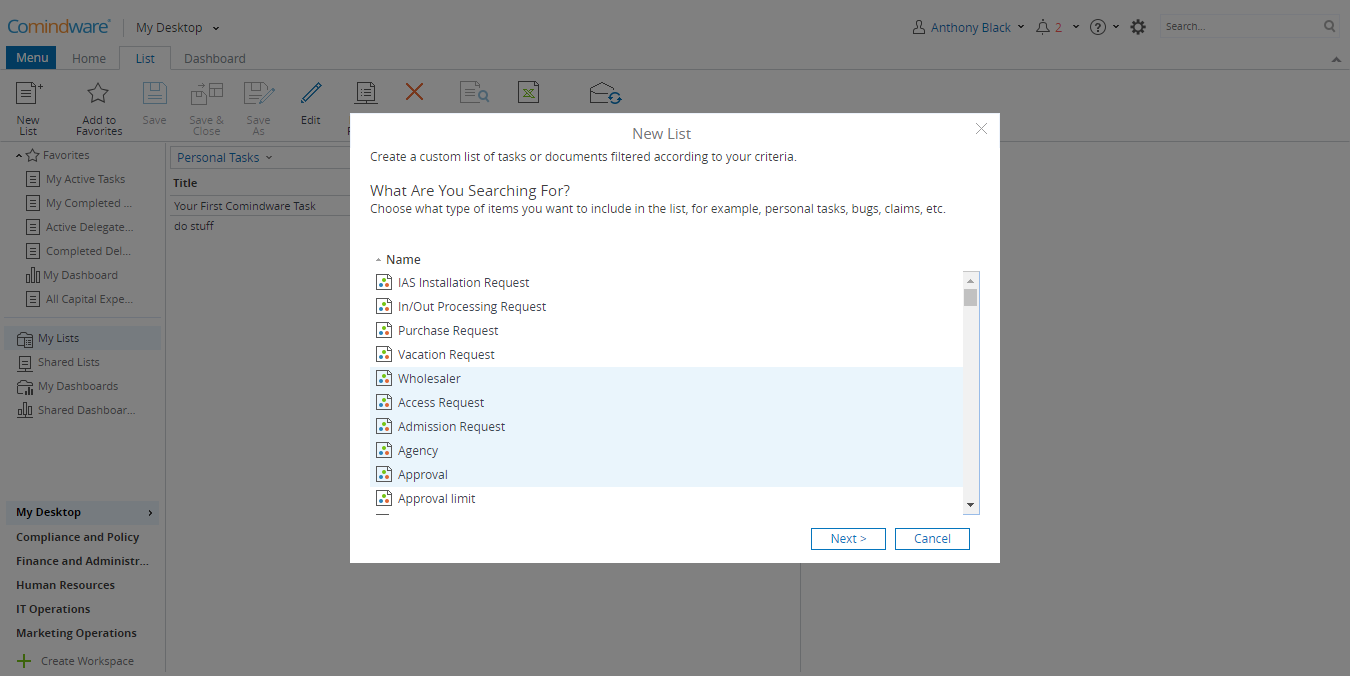
Choosing data for your list
3. Choose one or more applications that will serve as a data source for the list.

Choosing apps as a data source for your list
4. Click «Next» to move to the list configuration page.
5. Add the columns you want to be added to the list by dragging them from the «Available Fields» area to the «Add Columns» area.
6. Alternatively, you can configure the sort order and set column grouping by dragging and dropping them to the respective areas.
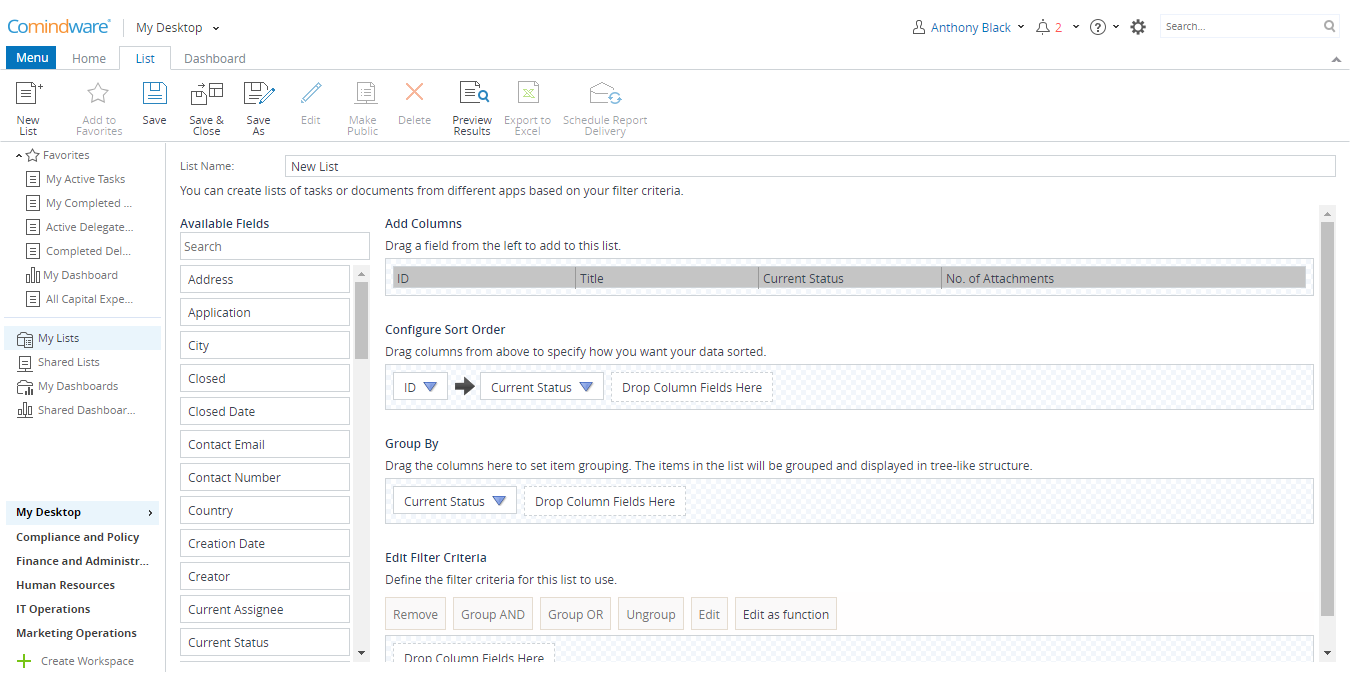
Choosing columns, sort order, and grouping
7. Create a filter for the list: drag and drop the columns you want to be filtered in the «Edit Filter Criteria» area, and set a filtering parameter. You can use logical operators in your filter, for example, «AND» and «OR».
8. Give a name to your list.
9. Click «Save & Close» in the Ribbon.
You can add the list to favorites or share the list between other users. To do that, go to the «List» tab and click either «Add to Favorites» or «Make Public» button in the Ribbon.