Configuring Synchronization Settings
After you install the CMW Tracker for Outlook, synchronization settings are configured automatically, but you can change them if necessary.
To change synchronization settings:
1. Launch Microsoft Outlook.
2. Go to «File > Options > Add-Ins».
3. Choose CMW Tracker for Outlook from the list of add-ins, and click the «Add-In Options» button.
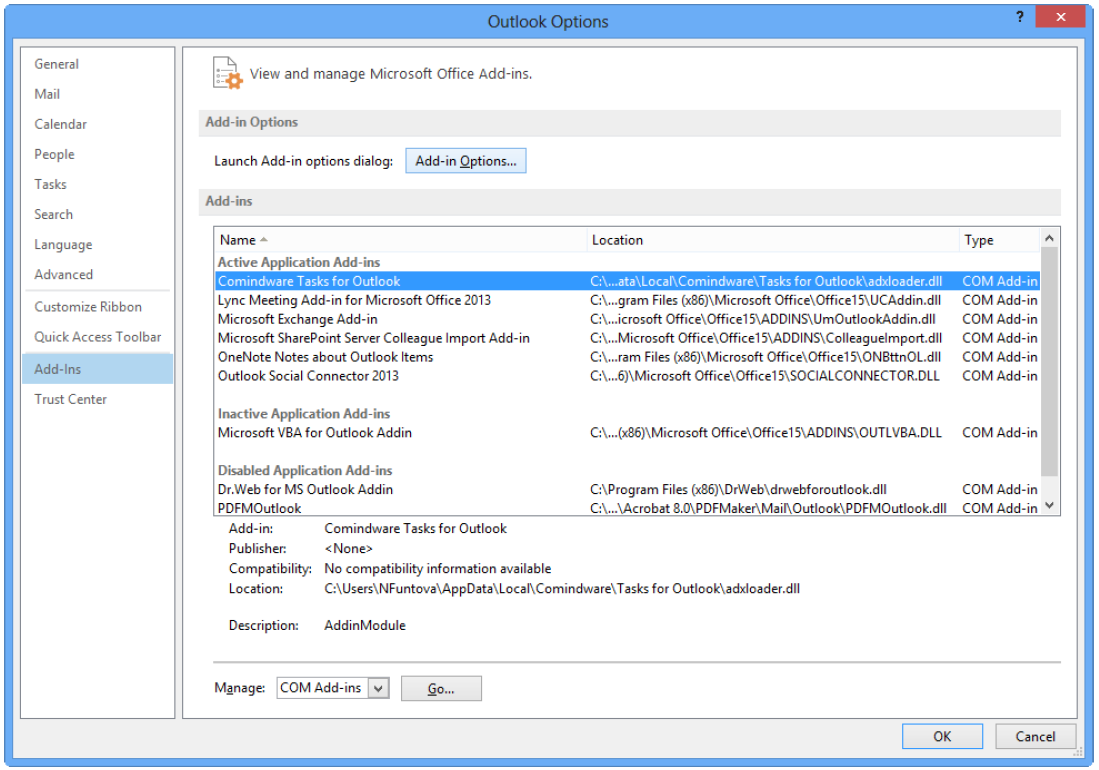
Choosing CMW Tracker for Outlook from the list of add-ins
Alternatively, you can click the Comindware tab in the Ribbon, and then click the «Setup» button.
4. When you install the add-in, it automatically gets your server location and account credentials, but you can change them if necessary. To do that, click «Change».
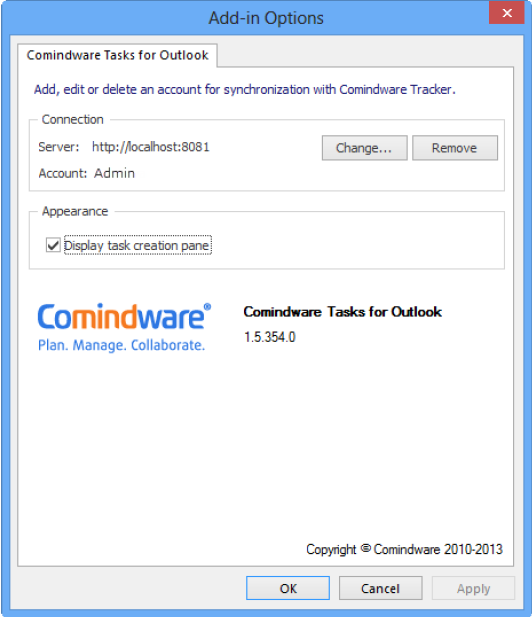
Synchronization settings
5. You can configure the following settings:
| Name | Description |
|---|---|
| Server URL |
The URL address of your CMW Tracker. The URL should start with http:// or https://. Example: http://yourbugtracker.yourcompany.com. |
| Login | Enter your CMW Tracker login. |
| Password | Enter the password for your Comindware account. |
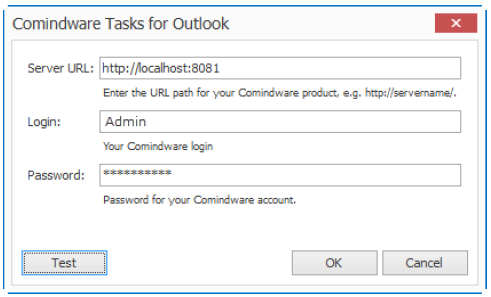
Changing synchronization settings
6. Click «Test» to check whether the settings you specified are correct.
7. Click «OK» to save the settings.