Configuring Single Sign-On under IIS
If your CMW Tracker is installed as an IIS server, you will need to configure Windows Authentication in IIS. The default authentication configuration for IIS 7 enables Anonymous authentication only.
Before configuring, make sure you have modified the web.config file.
To install the Windows Authentication module:
1. Go to «Start» > «Control Panel» > «Administrative Tools» > «Server Manager».
2. Click the «Roles» node to expand it.
3. Click «Web Server (IIS)», then right-click and select «Add Role Services».
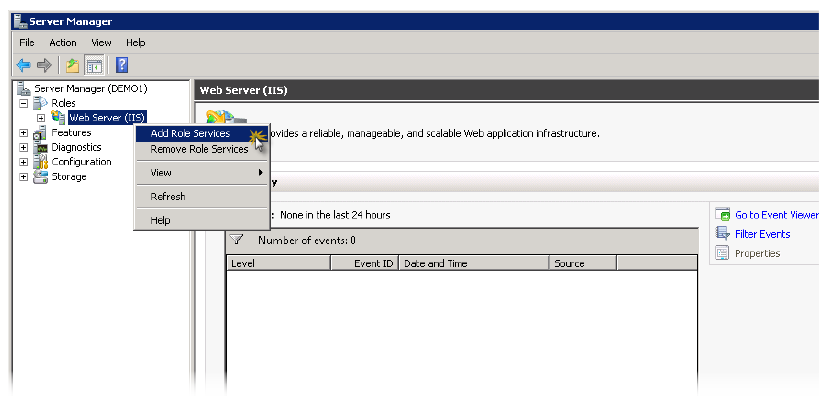
Add Role Services
4. Select the «Windows Authentication» check box and click «Next». If the box is already checked then that means the module is already installed.
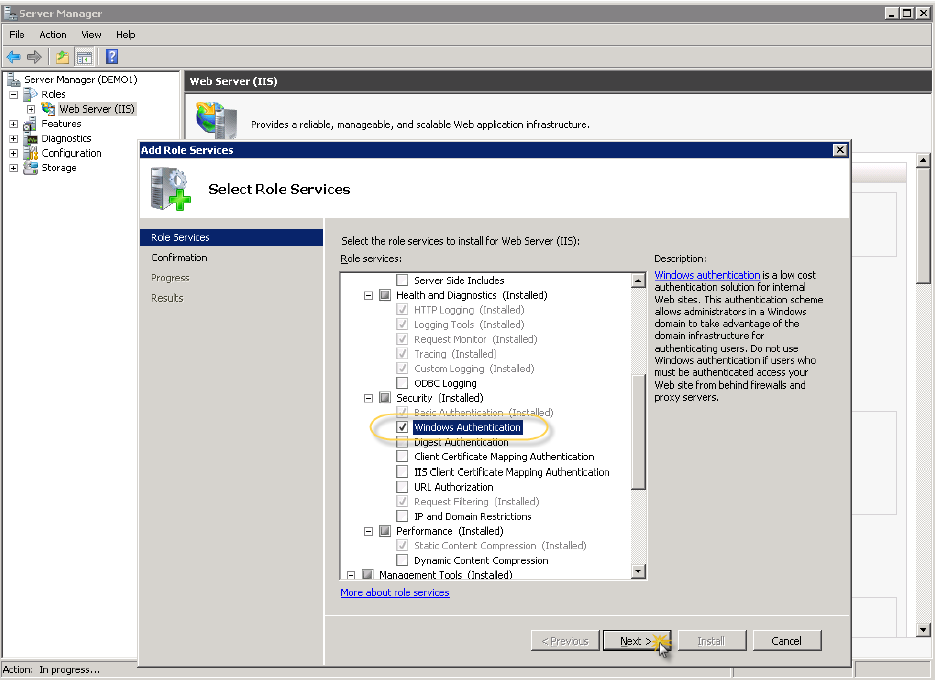
Windows Authentication
5. Click the «Install» button.
6. If you are working on Windows 8, also install the following features:
- .NET Framework 4.5 Advanced Services > WCF Services > HTTP Activation;
- Internet Information Services > World Wide Web Services > Application Development Features > ASP.NET 4.5;
- Internet Information Services > World Wide Web Services > Security > Request Filtering;
- Internet Information Services > World Wide Web Services > Security > URL Authorization.
To enable single sign-on:
1. Open the Web.config file in a text editor such as Notepad. By default the Web.config file is located in: C:\Program Files (x86)\Comindware\Products\Site\Web.config.
2. Find the following line in the file:
| <authentication mode=""None""/> |
3. Change the authentication mode from None to Windows:
|
<!-- To enable SSO set Windows mode instead of None --> <authentication mode=""Windows""/> |
4. Uncomment the following code:
|
<!-- Uncomment to enable SSO --> <!--authentication> <anonymousAuthentication enabled=""true"" /> <windowsAuthentication enabled=""true"" /> </authentication> <authorization> <remove users=""*"" roles="""" verbs="""" /> <add accessType=""Allow"" users=""*"" /> <add accessType=""Deny"" users=""?"" /> </authorization--> |
5. Save the Web.config file.
If you want to use single sign-on for the Comindware Tasks for Outlook add-in, first complete the steps described above, and then do the following:
1. Restart IIS.
2. Run Comindware.Platform.Server.exe as domain controller administrator.
3. Enter the -createSSO key and the machine's full domain name, including the port number. For example, Comindware.Platform.Server.exe -createSSO http://tracker.corp.mycompany.com:8081. This adds an entry to the Active Directory.
4. Install the Comindware Tasks for Outlook add-in.
5. Run Microsoft Outlook (version 2007 or above). In 5 to 50 seconds, the add-in will automatically download the required settings.
To remove the Active Directory entry:
1. Run Comindware.Platform.Server.exe as domain controller administrator.
2. Enter the -removeSSO key and the machine's full domain name, including the port number. For example, Comindware.Platform.Server.exe -createSSO http://tracker.corp.mycompany.com:8081.