Configuring Okta authentication
Contents
Before you start configuring it is essential to check that “Server Address” in Administration -> Global Settings has the correct external web address:
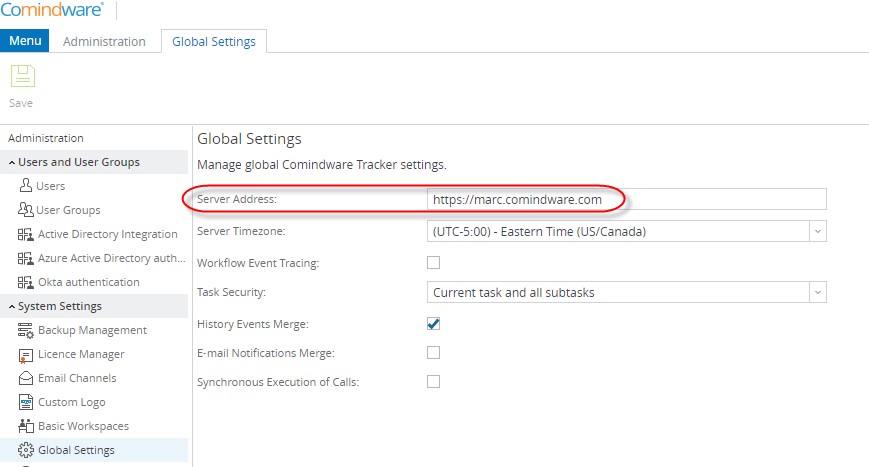
Server Address
Registering and configuring an application in Okta
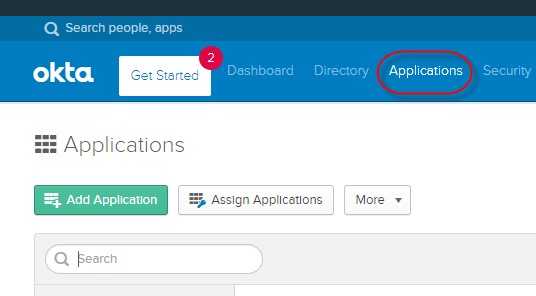
Registering an application in Okta
In order to register an application in Okta , you need to login to your Okta interface under your admin account. Then you need to go to the “Applications” section and click on “Add Application” button.
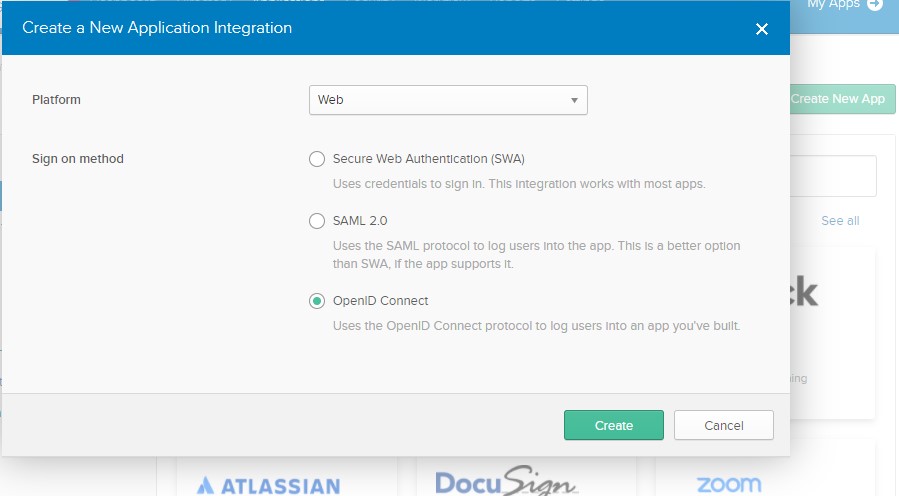
Creating application in Okta
Create a new Web application with OpenID Connect sign on method.
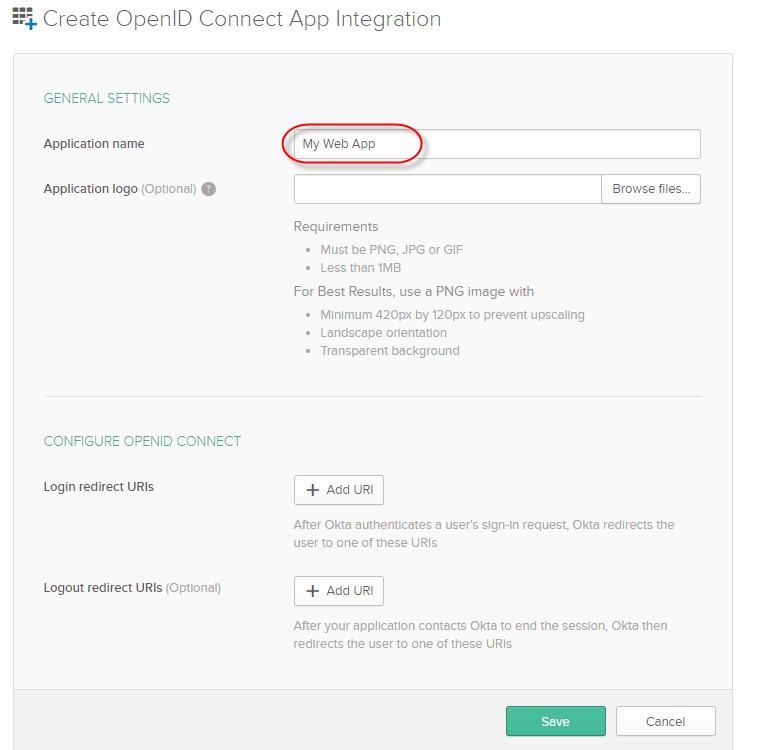
Creating a New Application Integration
Give your new application a name ( “CMW Tracker” would be a good, self-explanatory name) and specify your CMW Tracker instance’s URIs in the “Configure OpenID Connect” area. The URIs you need to specify under “Login redirect URIs” and “Logout redirect URI” in this section are the web pages users will be redirected to after logging in and after logging out, accordingly. To retrieve those URIs, go to the Administration area of your CMW Tracker, open “Okta authentication” , copy URIs from “Redirect URI” and “Logout URI” fields and paste them in the respective fields in the application. After doing that, click “Save” to create the Application.
Application configuration
User accounts in Okta
You need to make sure relevant user accounts are added to the Okta user catalogue intended for authentication using OpenId Connect . This can be done under the “Assignments” tab of Okta application settings. On that page you can assign all people you want to the application. Keep in mind that the email addresses of the accounts you add should be the same as those configured for corresponding user accounts in CMW Tracker.
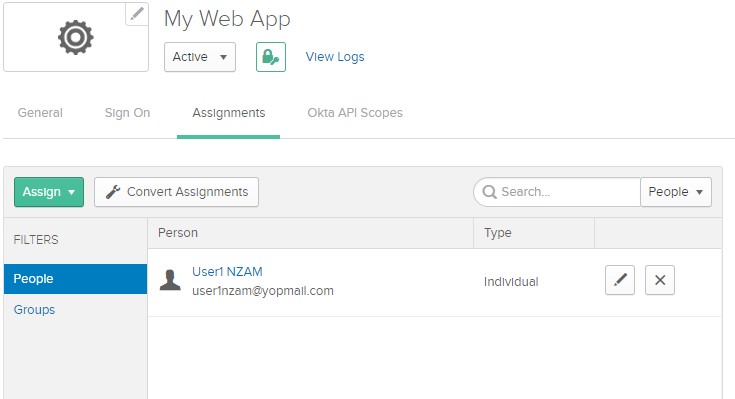
User assignment in Okta
As the next step, go to “General” tab and copy “Client ID” , “Client secret” and “Okta domain” values.
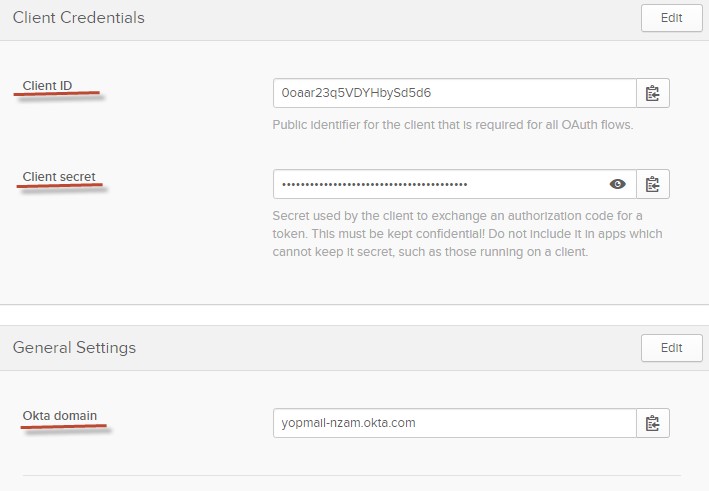
Fields to copy for further configuration
Configuring Okta authentication in CMW Tracker
General settings
To configure user authentication via Okta in CMW Tracker, you need to go to the Administration area and open the “Okta authentication” tab. Here is an outline of the settings you can find there:
- Enable authentication – activate/deactivate OpenId Connect (if disabled, users won’t see the button for authenticating with Okta at the logon screen);
- Application (client) ID – enter the “Client ID” of the application you registered in Okta;
- Client secret – enter the “Client secret” of the application you registered in Okta;
- Okta domain – enter the “Okta domain” of the application you registered in Okta;
- Redirect URI – this section is generated automatically in the format of: https://{yourhost}/Home/LoginByOkta ;
- Logout URI - this section is generated automatically in the format of: https://{yourhost}/Home/OktaPostLogout .
Configuring user accounts to use Okta authentication in CMW Tracker
There are four authentication methods used for user accounts in CMW Tracker: local, Active Directory, Azure Active Directory and Okta authentication . Each user account can have just one of them enabled for it at one time. In order to enable Okta authentication for a user account, you need to go to the Administration area, then to the “Users” tab, open the user account settings and pick the corresponding authentication method:
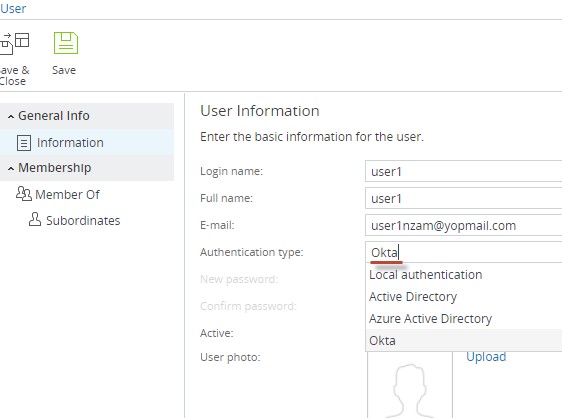
Choosing authentication type per user